

How To Change A Center Support Bearing
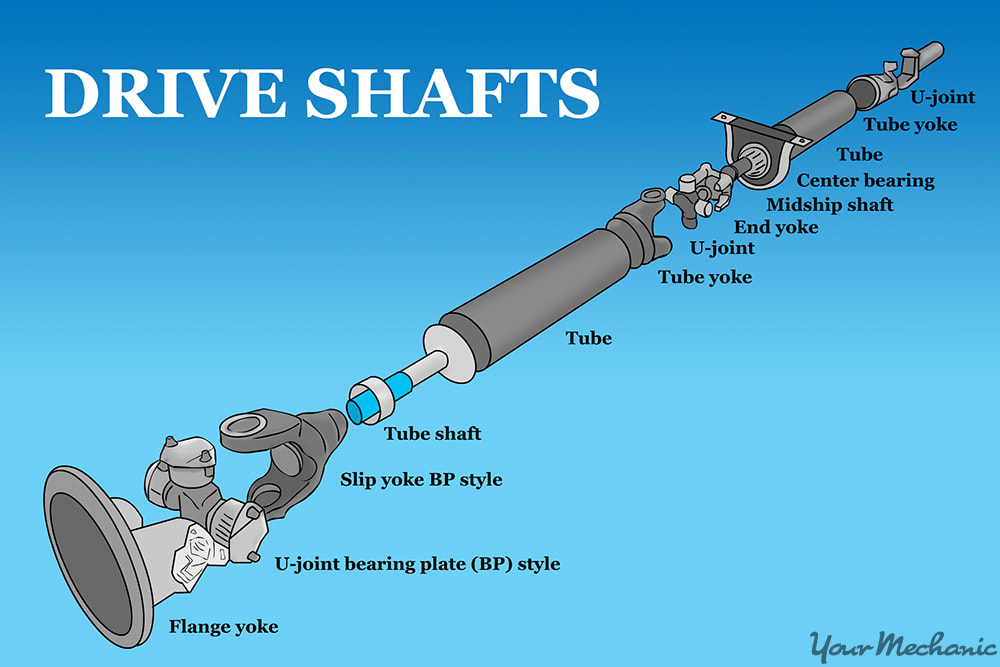
The driveshaft of a rear wheel or four-wheel drive vehicle is carefully assembled, precision balanced component that supplies power from the transmission to the rear heart gears and then to each rear tire and wheel. Connecting the ii sections of the driveshaft is a center back up bearing, which is a "U" shaped metal bracket with a solid-rubber machined bearing on the inside. The begetting is designed to go on both parts of the driveshaft solid in club to reduce harmonic vibration as the vehicle accelerates.
Although its blueprint and purpose is incredibly simplistic in nature, replacing a driveshaft center support bearing is not one of the easiest jobs to consummate. The primary reason why many DIY mechanics struggle with driveshaft middle support replacement due to the details involved with reassembly of the driveshaft.
- Note: Since all vehicles are unique, information technology's important to empathise that the guidelines and instructions listed below are general instructions. Make sure to verify specific instructions with your vehicle manufacturer service transmission earlier proceeding.
Role 1 of 5: Determining the symptoms of a bad driveshaft eye back up bearing
The driveshaft is a precision piece that is balanced perfectly before it is installed by the factory. It'due south also a very heavy slice of equipment. It'south recommended not complete this job on your own without the proper tools, experience and support equipment. If you don't feel 100 percentage confident about replacing the driveshaft center back up bearing, or don't have the recommended tools or help, please contact an ASE certified mechanic to complete this task for you.
A worn out or faulty middle back up bearing will produce a few symptoms that can alert the driver that a potential problem has occurred and requires replacement. Noted below are a few of these warning signs to expect for before you make the decision to supercede the driveshaft center support bearing.
Step i: Cheque for clunking noises when accelerating or decelerating. The most common sign that is a noticeable "clunking" sound coming from under the vehicle's floorboard.
Y'all'll often hear this when you accelerate or when the vehicle changes gears or during braking. The reason this sound is made is considering the inner bearing has worn out and causes the two attached driveshafts to become loose during acceleration and deceleration.
Pace ii: Sentry for shuddering during acceleration. Some other alarm indicator is when you feel a shudder on the floor board, the accelerator pedal or the brake pedal as you accelerate or restriction.
A failed bearing is unable to back up the driveshaft, and as a event the driveshaft will flex, causing a vibration and shuttering sensation that tin be felt throughout the vehicle when it's broken.
Part two of 5: Physically audit the driveshaft heart support bearing
Once y'all've properly diagnosed the trouble and you're fairly sure that the cause is due to a worn out middle support bearing, the side by side footstep is to physically inspect the office. This is a critical stride where many DIY mechanics and even new ASE certified mechanics tend to skip. Before proceeding, ask yourself this simple question: "Without manually inspecting the part, how can I be 100 per centum certain that it's the root cause of the symptoms I'm trying to solve?" With an internal engine component, this is very hard to do without disassembling the motor. However, the heart support bearing is exposed under the vehicle and piece of cake to audit.
Materials Needed
- Heart protection
- Flashlight
- Gloves
- Piece of chalk or marking
- Roller or creeper if the vehicle is not on a lift
Footstep i: Put your gloves and middle protection on. You don't desire to start grabbling or handling metal objects without protection for your hands.
The top of the middle support begetting may be precipitous and cause serious cuts to easily, knuckles and fingers. Plus, there will be a tremendous amount of dirt, crud and droppings under your vehicle. Since you'll be looking upward, it's likely that this debris will fall into your optics. Although it's causeless that blood, sweat, and tears are needed to repair virtually vehicles, reduce the potential of blood and tears and think safety first.
Step two: Curl underneath the vehicle to where the eye support begetting is located. Once you have the proper safety equipment in place, you lot'll need to ensure the vehicle is secure on the lift.
Step three: Locate the forepart and rear driveshaft(s). Find where these are located on your auto.
Step 4: Locate the middle attachment where both driveshafts meet. This is the center support bearing housing.
Step 5: Grab the front driveshaft and try to "shake it" most the heart support bearing. If the bulldoze shaft shakes or appears loose inside the bearing, the middle support bearing needs to be replaced.
If the driveshaft is solidly mounted in the bearing, you've got a different trouble. Complete the same physical inspection with the rear driveshaft and verify the loose bearing.
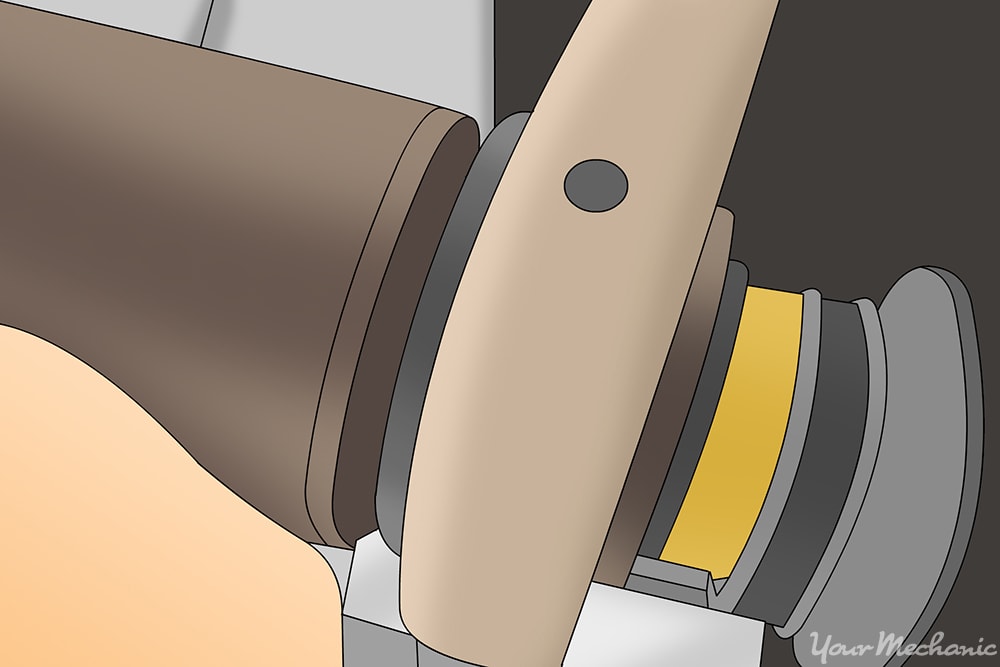
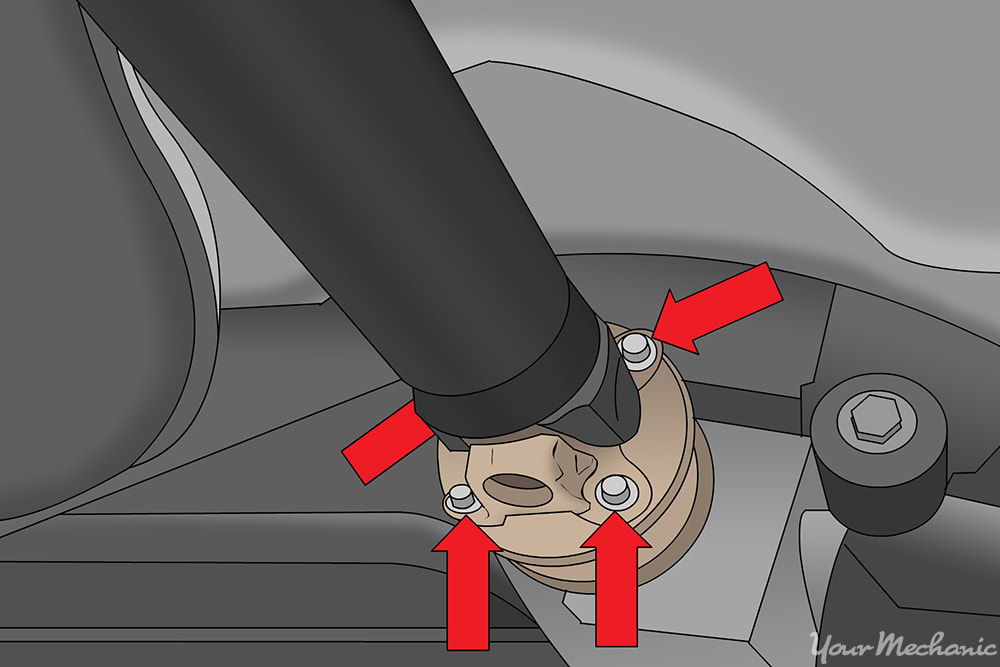
Stride 6: Marking the alignment of both front and rear driveshaft. The 2 driveshaft'southward that attach in the centre support bearings are fastened on opposite sides of the vehicle as well.
The front end drive shaft is attached to the output shaft coming out of the transmission, while the rear driveshaft's propeller shaft is attached to the yoke that comes out of the rear axle differential.
- Warning: Every bit noted in a higher place, the driveshaft is carefully counterbalanced and needs to be removed in order to supervene upon the middle support bearing. Failure to reattach the driveshaft on front and dorsum, precisely where they came from will result in an unbalanced driveshaft that volition vibrate and may cause serious damage to the transmission or rear stop gears.
Stride 7: Locate where the forepart driveshaft attaches to the transmission. Using your chalk or marker, describe a solid line directly underneath the transmission output shaft and align that line to a similar line drawn on the forepart of the driveshaft.
Driveshafts that are continued into a splined shaft on the transmission tin just fit in 1 direction, but it'southward still recommended to mark both ends for consistency.
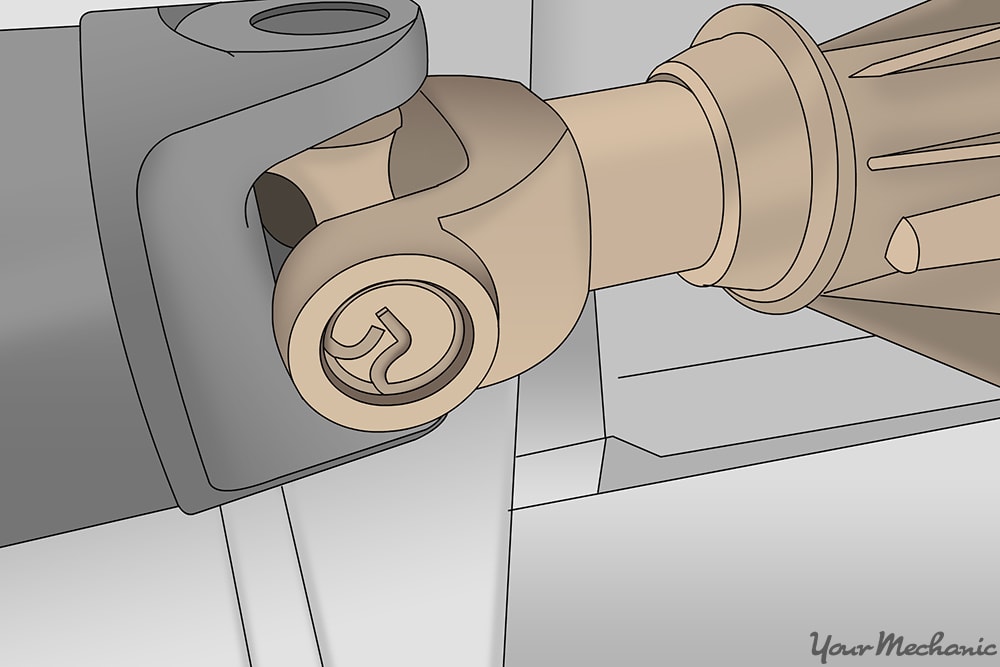
Footstep viii: Brand the same reference markings. Locate where the rear driveshaft attaches to the rear end yoke and complete the aforementioned reference markings as shown in the paradigm above.
Part three of 5: Securing the correct parts and prepare for replacement
Afterward you've correctly adamant that the heart support bearing is damaged and needs to be replaced, yous need to ready for the replacement. The outset thing you should practice is secure the correct replacement parts, tools and materials that you'll need to consummate this job safely and correctly.
Materials Needed
- Jack and jack stands
- WD-40 or other penetrating oil
- Piece of work light
Step 1: Prepare the vehicle for working. Utilize a flooring jack to raise the vehicle to a top that will allow easy access to the driveshaft while using your tools.
Jack one wheel at a fourth dimension and place jack stands underneath solid mounts for support. Once the vehicle is secured make sure yous have plenty light to see underneath the vehicle. A work calorie-free fastened to the front end beam or rear axle is a good idea.
Step two: Lubricate rusty bolts. While you lot are nether the vehicle, take a can of WD-40 and spray a liberal amount of penetrating fluid on each bolt that attaches the driveshaft (the front and rear).
Permit the penetrating oil sit for x minutes before removing proceeding to next footstep.
Role 4 of five: Replace the center support bearing
Materials Needed
- Brass center tap
- Combination wrench set and extensions
- Grease
- Replacement eye support bearing
- Replacement clamp
- Condom or plastic tipped hammer
- Socket wrench set
-
Piece of work calorie-free
-
Note: Check with manufacturer on recommended grease for bearings on your item vehicle.
-
Annotation: For the replacement center support begetting, be sure to acquire the precise office recommended by the vehicle manufacturer (only supervene upon with the entire housing that includes the outer housing, inner begetting and inner plastic supports).
-
Warning: Do not endeavour to replace inner begetting merely.
Tip: There are a lot of people that believe it's possible to remove the center support begetting and reattach it by using a press or other methods. In almost cases, this method fails as the bearing is not properly attached or secured. In club to avoid this problem, locate a local machine shop that can remove and install the middle support bearing correctly.

Footstep 1: Remove the front driveshaft. The front driveshaft is attached to the manual output shaft and connected by four bolts.
On some rear wheel drive vehicles, the begetting block bolts thread into nuts that are solidly mounted or welded onto the frame. On some vehicles, two function nuts and bolts are used to attach the rear of the front end driveshaft to the center support begetting.
Step 2: Remove the bolts. Become the correct size finish wrench or socket wrench to do this.
Pace 3: Remove the front end office of the driveshaft. The front driveshaft is going to exist attached solid inside the output shaft supports.
In order to remove the driveshaft, you'll need a rubber or plastic tipped hammer. On the forepart of the driveshaft is a welding marking that is solid and is the best place to hit with the hammer to loosen the driveshaft. Using the hammer and with your other mitt supporting the driveshaft from underneath, hit the weld mark solidly. Repeat until the drive shaft is loose and tin can exist removed from the front.
Pace 4: Remove the bolts attaching the forepart driveshaft to the middle support bearing. Once the bolts are removed, the front end driveshaft will exist discrete from the center back up begetting.
Pace five: Place the front driveshaft in a secure surface area. This will proceed it from being damaged or misplaced.
Step 6: Remove the rear driveshaft. The rear driveshaft is fastened to the rear stop yoke.
Step 7: Remove the rear driveshaft. Remove the bolts that attach the 2 components together first; then advisedly remove the driveshaft from the yoke using the aforementioned method equally the forepart driveshaft.
Pace 8: Remove the center clip that attaches the rear driveshaft to the center support bracket. This clip is removed with a directly-edge screwdriver.
Advisedly unscrew this and slide behind the safety boot for future utilize.
- Warning: If you remove the clamp all the way, it will be very difficult to correctly replace information technology; which is why it'southward recommended to a higher place to buy a new replacement clench that you can reinstall to adhere the rear driveshaft to the eye support bearing.
Step 9: Remove the boot. After you lot've removed the clamp, slide the boot from the center support bearing.
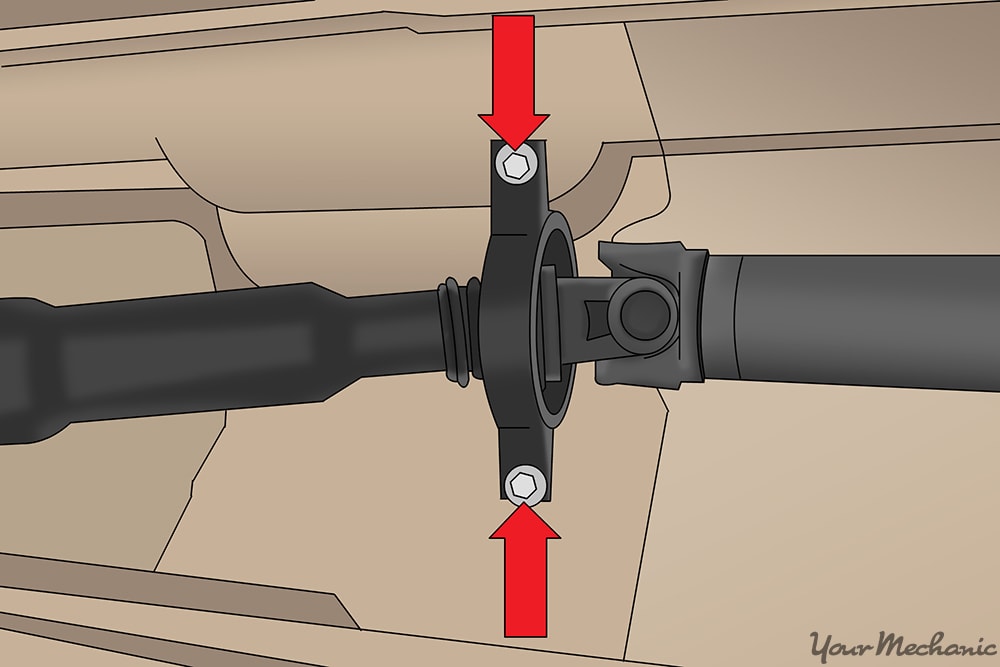
Step 10: Remove the eye support bearing housing. Once you've removed the rear driveshaft, you'll exist ready to remove the center housing.
At that place are ii bolts on top of the housing that you'll need to remove. Once both bolts are removed, you'll be able to slide the front driveshaft and rear input shaft easily from the center bearings.
Step 11: Remove the old begetting. The best way to attain this pace is to have a professional auto store remove and professionally install the new bearing.
They have access to meliorate tools that allow them to complete this task easily than most DIY mechanics. Listed below are the steps to follow if you don't take access to a machine shop or choose to undertake this stride on your ain.
Step 12: Remove the bolts. Remove the ones that connect the front portion of the driveshaft to the rear driveshaft.
Footstep 13: Secure the forward part of the driveshaft. Secure it into a bench vise.
Step 14: Unscrew the heart nut. This is the nut that volition agree the connecting plate on the shaft where the center bearing is placed.
Step fifteen: Tap the worn out center support bearing off the driveshaft. Use a hammer and brass center punch.
Footstep 16: Clean the ends of the driveshaft. In one case the centre support bearing has been removed, clean all ends of each driveshaft with solvent and prepare to install the new bearing.
- Warning: Improper installation of the center back up begetting can pb to serious harm to the transmission, rear gears, and axles. When in uncertainty, contact a local ASE certified mechanic or auto shop to professionally install the center rear begetting.
Step 17: Install new bearing. This is the nigh critical office of this job. Again, if you're not 100 pct confident, have a professional auto shop install the new begetting. Information technology can save you a tremendous amount of stress and coin.
Footstep 18: Employ grease. Add a thin layer of recommended grease onto the bearing shaft to ensure proper lubrication and to allow the bearing to slide on much easier.
Footstep 19: Push the bearing onto the shaft as straight as possible. Apply a rubber or plastic tipped hammer to guide the bearing onto the driveshaft.
Footstep xx: Check bearing installation. Verify that the bearing spins easily on the driveshaft without any wobbles or movement.
Step 21: Reinstall center support begetting and driveshaft. This is the easiest part of the job, as all you lot need to practise is reinstall each section in opposite social club that you followed with the installation.
First, reattach the middle support begetting to the frame.
2nd, insert the rear driveshaft into the spline, replace boot over the spline, and reattach the clamp.
3rd, reattach the rear driveshaft to the yoke; making sure to marshal the marks on both the rear driveshaft and the yoke before inserting bolts. Tighten all bolts to manufacturers recommend torque pressure settings. Verify that all bolts and nuts are tight earlier proceeding.
Fourth, reattach front of driveshaft to the manual output shaft, again verifying the alignment marks previously fabricated. Tighten all bolts to manufacturers recommend torque pressure settings. Verify that all bolts and nuts are tight before proceeding
5th, catch the front driveshaft where it attaches to the center support bearing and verify that it is securely fastened. Complete the aforementioned check with the rear driveshaft
Pace 22: Remove all tools, used parts and materials from under the vehicle. This includes jack stands from each wheel; place the vehicle back onto the ground.
Part 5 of v: Test drive the vehicle
Afterwards yous've successfully replaced the center bulldoze bearing, you'll desire to test drive the vehicle to ensure the original problem has been fixed. The best way to complete this examination drive is to programme your route offset. Make sure you bulldoze on a straight road with every bit few bumps as possible. It's OK to make turns, just try to avert twisty roads at get-go.
Step i: Kickoff the vehicle. Let information technology warm up to operating temperature.
Step 2: Slowly drive onto the road. Ease onto the accelerator to gain speed.
Stride iii: Scout for old symptoms. Make sure to accelerate to a speed where the vehicle will exist placed into the aforementioned scenario where the original symptoms were noticed.
If you've properly diagnosed and replaced the center support begetting, you should be skillful to get. If however, you've completed each step of the in a higher place procedure and even so are having the aforementioned symptoms as y'all originally had, information technology would exist best to contact one of our experienced mechanics from YourMechanic to aid you diagnose the upshot and brand advisable repairs.
The statements expressed in a higher place are simply for advisory purposes and should be independently verified. Please see our terms of service for more details
Source: https://www.yourmechanic.com/article/how-to-replace-a-driveshaft-center-support-bearing-by-timothy-charlet
Posted by: abbottowelast.blogspot.com
0 Response to "How To Change A Center Support Bearing"
Post a Comment